Spring Boot JPA 게시판 댓글 수정 및 삭제 구현하기
by coco3o반응형
저번 글에 이어서 구현한 기능들을 포스팅 하겠다.
( 링크 )
Spring Boot JPA 게시판 댓글 작성 및 조회 구현하기
게시판에서 댓글은 없어선 안될 중요한 부분이라고 생각한다. 그래서 오늘은 게시판의 댓글 기능을 구현해보려 한다. 1. Entity 1-1. Comment @Builder @AllArgsConstructor @NoArgsConstructor @Getter @Table(n..
dev-coco.tistory.com
1. Entity
Comment
    /* 댓글 수정을 위한 setter */
    public void update(String comment) {
        this.comment = comment;
    }
2. Controller
CommentApiController
@RequiredArgsConstructor
@RequestMapping("/api")
@RestController
public class CommentApiController {

    private final CommentService commentService;

    ...

    /* UPDATE */
    @PutMapping({"/posts/{postsId}/comments/{id}"})
    public ResponseEntity<Long> update(@PathVariable Long postsId, @PathVariable Long id, @RequestBody CommentDto.Request dto) {
        commentService.update(postsId, id, dto);
        return ResponseEntity.ok(id);
    }

    /* DELETE */
    @DeleteMapping("/posts/{postsId}/comments/{id}")
    public ResponseEntity<Long> delete(@PathVariable Long postsId, @PathVariable Long id) {
        commentService.delete(postsId, id);
        return ResponseEntity.ok(id);
    }
}
3. Service
CommentService
@RequiredArgsConstructor
@Service
public class CommentService {

    private final CommentRepository commentRepository;
    private final UserRepository userRepository;
    private final PostsRepository postsRepository;

    ...

    /* UPDATE */
    @Transactional
    public void update(Long postsId, Long id, CommentDto.Request dto) {
        Comment comment = commentRepository.findByPostsIdAndId(postsId, id).orElseThrow(() ->
                new IllegalArgumentException("해당 댓글이 존재하지 않습니다. " + id));

        comment.update(dto.getComment());
    }

    /* DELETE */
    @Transactional
    public void delete(Long postsId, Long id) {
        Comment comment = commentRepository.findByPostsIdAndId(postsId, id).orElseThrow(() ->
                new IllegalArgumentException("해당 댓글이 존재하지 않습니다. id=" + id));

        commentRepository.delete(comment);
    }
}
comment 객체에 데이터를 가져와 영속화시키고, 데이터를 변경하여 트랜잭션 종료 시점에 커밋되도록 만들었다.
4. Mustache
comment/list.mustache
{{! Comments }}
<div class="card">
    {{! 댓글 개수 }}
    <div class="card-header bi bi-chat-dots"> {{#comments.size}}{{comments.size}}{{/comments.size}} Comments</div>

    {{! 댓글리스트 }}
    <ul class="list-group-flush">
        {{#comments}}
            <li id="comments-{{id}}" class="list-group-item">
                <span>
                    <span style="font-size: small">{{nickname}}</span>
                    <span style="font-size: xx-small">{{createdDate}}</span>
                </span>
                <a type="button" data-toggle="collapse" data-target=".multi-collapse-{{id}}"
                class="bi bi-pencil-square"></a> {{! 댓글 수정 버튼 }}

                <a type="button" onclick="main.commentDelete({{postsId}},{{id}})"
                 class="bi bi-x-square"></a> {{! 댓글 삭제 버튼 }}

                {{! 댓글 내용 }}
                <p class="collapse multi-collapse-{{id}} show">{{comment}}</p>

                {{! 댓글 수정 }}
                <form class="collapse multi-collapse-{{id}}">
                    <input type="hidden" id="id" value="{{id}}">
                    <input type="hidden" id="postsId" value="{{postsId}}">
                    <div class="form-group">
                        <textarea class="form-control" id="comment-content" rows="3">{{comment}}</textarea>
                    </div>
                    <button type="button" id="btn-comment-update" class="btn btn-outline-primary bi bi-pencil-square"> 수정</button>
                </form>
            </li>
        {{/comments}}
    </ul>
</div>
<br/>
bootstrap의 collapse(메뉴 접기, 펴기)를 사용해 댓글 수정화면을 구현했다.
https://getbootstrap.com/docs/3.3/javascript/#collapse
5. app.js
const main = {
    init : function() {
        const _this = this;

        ...

        // 댓글 수정
        document.querySelectorAll('#btn-comment-update').forEach(function (item) {
            item.addEventListener('click', function () { // 버튼 클릭 이벤트 발생시
                const form = this.closest('form'); // btn의 가장 가까운 조상의 Element(form)를 반환 (closest)
                _this.commentUpdate(form); // 해당 form으로 업데이트 수행
            });
        });
    },

    ...

    /** 댓글 수정 */
    commentUpdate : function (form) {
        const data = {
            id: form.querySelector('#id').value,
            postsId: form.querySelector('#postsId').value,
            comment: form.querySelector('#comment-content').value,
        }
        if (!data.comment || data.comment.trim() === "") {
            alert("공백 또는 입력하지 않은 부분이 있습니다.");
            return false;
        }
        const con_check = confirm("수정하시겠습니까?");
        if (con_check === true) {
            $.ajax({
                type: 'PUT',
                url: '/api/posts/' + data.postsId + '/comments/' + data.id,
                dataType: 'JSON',
                contentType: 'application/json; charset=utf-8',
                data: JSON.stringify(data)
            }).done(function () {
                window.location.reload();
            }).fail(function (error) {
                alert(JSON.stringify(error));
            });
        }
    },
    /** 댓글 삭제 */
    commentDelete : function (postsId, commentId) {

        const con_check = confirm("삭제하시겠습니까?");
        if (con_check === true) {
            $.ajax({
                type: 'DELETE',
                url: '/api/posts/' + postsId + '/comments/' + commentId,
                dataType: 'JSON',
            }).done(function () {
                alert('댓글이 삭제되었습니다.');
                window.location.reload();
            }).fail(function (error) {
                alert(JSON.stringify(error));
            });
        }
    }
};

main.init();
6. 결과 확인
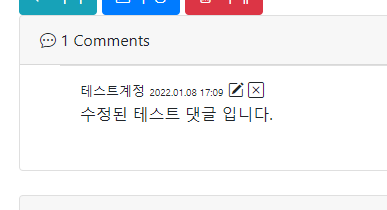
6.1 댓글 수정


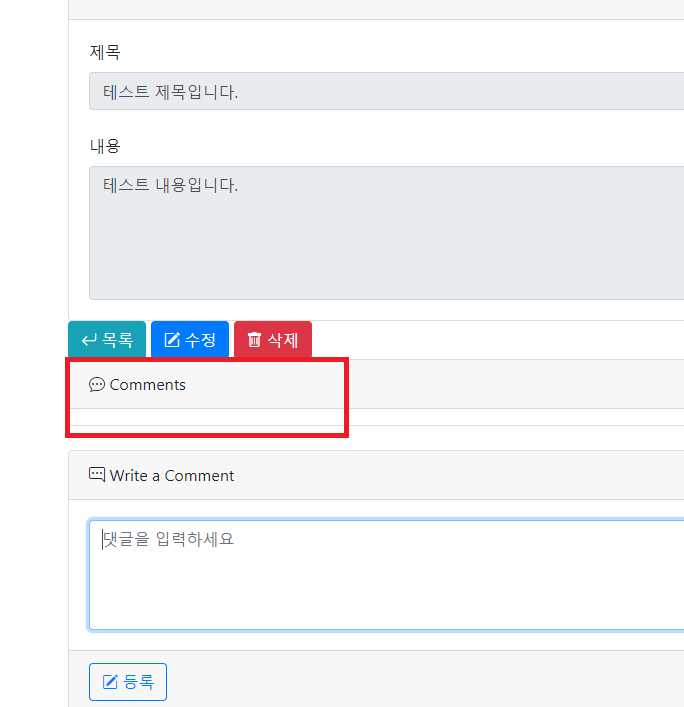
6.2 댓글 삭제


반응형
'📌ETC > Development Log' 카테고리의 다른 글
| DTO Inner Class로 한번에 관리하기 (2) | 2022.01.13 |
|---|---|
| Spring Boot JPA 게시판 댓글 작성자만 수정, 삭제 가능하게 하기 (1) | 2022.01.08 |
| Spring Boot JPA 게시판 댓글 작성 및 조회 구현하기 (2) | 2022.01.04 |
| Spring Boot 게시판 JPA 연관관계 매핑으로 글 작성자만 수정, 삭제 가능하게 하기 (0) | 2021.12.30 |
| Spring Boot 게시판 OAuth 2.0 네이버 로그인 구현 (1) | 2021.12.28 |
블로그의 정보
슬기로운 개발생활
coco3o